In this guide
- First, figure out which problem you actually have
- Why headlights go cloudy and yellow in the first place
- The quick hacks: which ones actually work on surface haze
- The "hacks" to avoid, and the truth about the popular ones
- Keeping them clear: prevention that actually helps
- When the fog is on the inside: getting moisture out of a sealed headlight
- Putting it all together
One evening you pull out onto a dark road and notice it immediately: your headlights have stopped working the way they should. The beams are weak, short, scattered. Up close, the lenses look yellowed and milky—like they've developed cataracts. Or maybe the plastic itself looks fine, but there's a fog of water droplets sitting on the inside of the lens. You can't reach it. You can't touch it.
So you search for a fix. Within five minutes you're drowning in contradictions. One video swears toothpaste works. A forum insists it's WD-40. Someone else is spraying bug repellent on their car. Another person has drilled a hole in the housing. A detailer says the only real answer is sanding the lenses down and starting over. It's exhausting. And most of it never explains what actually matters: which of two completely different problems you're looking at.
That's the real issue. "Foggy headlights" hides two separate problems that people lump together. The fixes have almost nothing in common. One is haze and yellowing on the outside of the plastic, caused by the sun slowly breaking the lens down. The other is condensation on the inside, caused by moist air or a broken seal. Treating one like the other is why so many people scrub for an hour and get nowhere. This guide separates the two cleanly. It explains how to tell which problem you have, which quick hacks actually work, which ones quietly damage your car, how to do a proper restoration that lasts, how to get water out of a sealed headlight without a mechanic, and how to adapt all of this to the heat, sun, and dust of Kuwait's climate. By the end, you'll know exactly what to do and why.
First, figure out which problem you actually have
Before you touch any product, spend thirty seconds diagnosing. The two problems live in different places. They need opposite tools.
Run your fingertip over the lens. If the surface feels rough, chalky, or textured—and the yellow or milky look doesn't wipe away—the damage is on the outside of the plastic. That's oxidation. It's a cleaning-and-restoring job. If the plastic surface is smooth and clear but you can see fog, droplets, or a waterline behind the lens where your cloth can't reach, that's trapped moisture inside the housing. It's a sealing job. You might have both at once. Fix them separately.
There's a quick test for the inside problem. Turn the headlights on and let them run for a while. Then look again. AutoZone explains that minor internal fogging often clears on its own once the bulb warms the air inside the housing and the vapour escapes through a small vent. If the fog burns off when you drive and doesn't come back badly, you're dealing with a minor issue. If the moisture gets progressively worse, if there's water actually pooling inside, or if it's dimming your beams in the dark,treats that as a more serious leak that needs attention. Hold that distinction. The whole second half of this guide depends on it.
The rest of the guide is built in that order: first the outside haze, which is by far the most common complaint, then the moisture inside.
Why headlights go cloudy and yellow in the first place
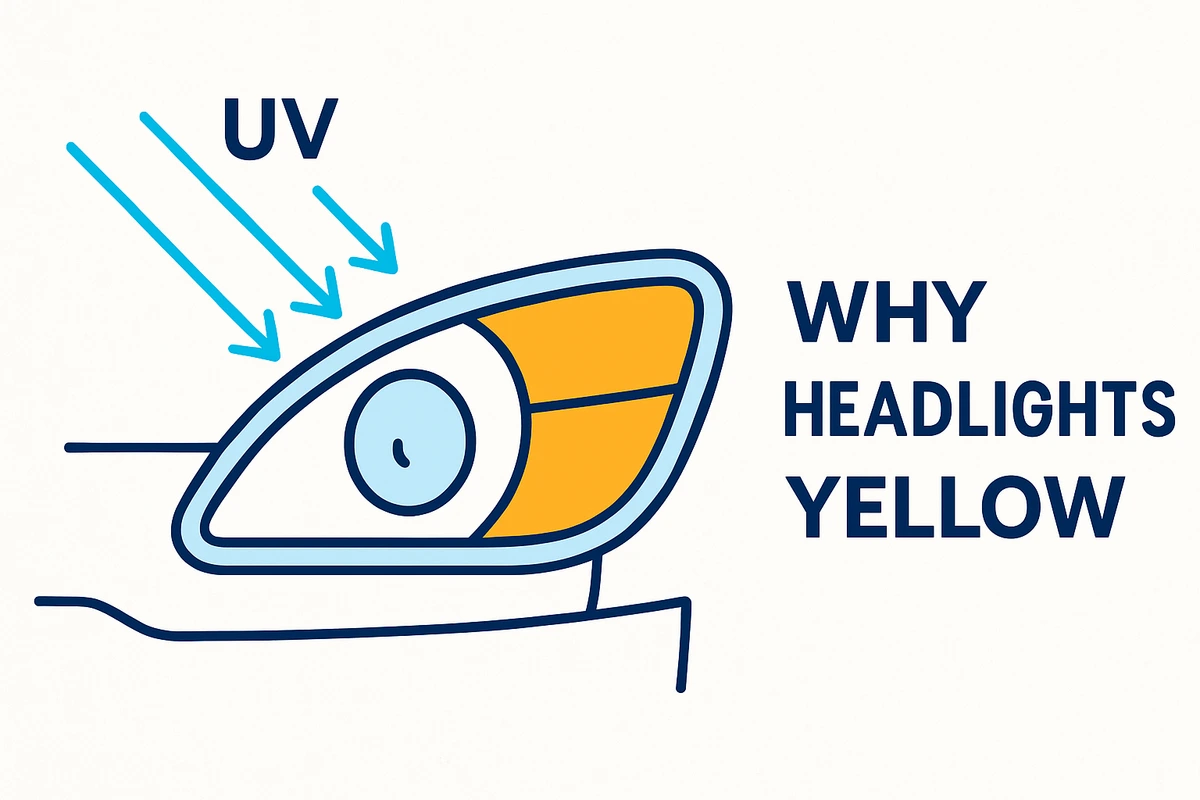
To fix outside haze properly, you need to understand what you're actually looking at. It tells you why the cheap tricks are temporary.
Modern headlight lenses aren't glass. They're moulded from clear, lightweight plastic. And that plastic is the whole problem. Chemical Guys describes most modern headlights as acrylic that breaks down in the sun. The factory clear coat gets worn away by UV rays until the plastic underneath turns yellow and foggy. Allstate refers to the material more commonly used today as polycarbonate plastic. It allows high light transmission and has good UV resistance, but it can still yellow and dull over time. The exact polymer varies. The failure story is the same everywhere: a protective coating sits on top of clear plastic. The sun destroys the coating. Then the exposed plastic degrades.
What that degradation looks like up close is the useful part. AAA explains that as the lens oxidises in sunlight it develops microscopic cracks. Those cracks collect dirt and debris, which further reduces how clearly the headlight can shine. No amount of trips through a car wash will fix it. Instructables makes a related point from a hands-on angle: because the plastic is porous, once oxidation begins it quickly degrades the lens. Simply wiping the surface never brings it back. This is the single most important idea in the whole topic. The damage isn't dirt sitting on top of the plastic that you can wash off. It's a layer of the plastic itself that has gone bad. The only way to truly fix it is to remove that dead layer and reseal what's underneath. Every method in this guide is really just a gentler or more aggressive version of that one idea.
The Kuwait factor: sun, heat, and dust
If you understand that the sun is the enemy, you can see why headlights in the Gulf have a harder life than almost anywhere else. The failure is driven by UV exposure. WD-40 specifically names high sun exposure, along with salty air and age, as a common reason headlights turn foggy and hazy. A car that spends its days parked under a Kuwait summer sun gets far heavier UV radiation than a car kept in a garage or a milder climate. It's fair to treat rapid yellowing here as a symptom of the environment, not a sign you did anything wrong.
recommends parking out of direct sunlight whenever possible to reduce UV exposure and slow oxidation.lists parking in shade and using a car cover as ways to prevent headlights from oxidising in the first place. In a climate where the sun is the main culprit, a covered parking spot is genuinely a headlight-preservation strategy.
Second, dust isn't just cosmetic. It actually connects to the inside problem too.notes that a common cause of minor internal condensation is a blocked headlight vent. The blockage comes from debris, spider webs, or dust. In a dusty environment, that vent is far more likely to clog. It's a small but real regional reason to keep the back of your headlight housings clean when you have the chance.
The quick hacks: which ones actually work on surface haze
For light to moderate outside haze, there's a whole family of cheap kitchen-cupboard tricks. The honest answer is that several of them genuinely do something. Understanding what "something" means is key. All of them work the same way: a mild abrasive scuffs off the top layer of oxidised plastic. And all of them share the same catch.points out that the mild abrasive doing the cleaning may also strip the headlight of the coating meant to protect it. That hurts how long any of these solutions last on their own. These tricks can make a hazy lens look much better today. Because they remove protection, the haze tends to come back unless you seal the lens afterward. Keep that in mind for every method below.
Toothpaste. This is the famous one. It's not a myth.confirms that most regular toothpastes contain enough abrasive to scuff away the yellow film on old headlights while still being gentle enough not to scratch the plastic. You can use a baking-soda toothpaste for extra cleaning power.agrees but adds the honest limit: toothpaste can temporarily clear up minor oxidation, but it's not a long-term solution compared with dedicated products. So toothpaste is real. It's a mild fix for mild haze. And it's temporary.describes the method: rub toothpaste mixed one-to-one with baking soda onto the lens, let it dry, then wipe it off with a wet cloth and seal afterward.
Baking soda and vinegar. Another mild abrasive-and-cleaner combination that works.describes mixing a paste of white vinegar and baking soda in a two-to-one ratio, applying it with a microfiber cloth or soft toothbrush in a circular motion, then rinsing with warm water and repeating until clean.offers a one-to-one version that fizzes into a paste, left to sit a few minutes before wiping away. Finish with a UV sealant for longer-lasting results.
Lemon. The acidity does some of the work.explains that lemon juice can help clear away dirt and oxidation, either wiped on with a microfiber towel or used by rubbing a baking-soda-dipped lemon half directly on the lens. Here's the important warning:cautions that lemon juice left to dry on paint or bodywork can damage it. Rinse and follow with a clean cloth every time.
A headlight restoration kit. If you want the best result from the "quick" category, this is it.describes purpose-built kits as one of the most thorough ways to clean and restore headlights. They typically contain fine-grit sanding pads, a clarifying compound, cleaner, and lens wipes. They're cost-effective and effective at clearing cloudy headlights.adds a sensible caveat: because the exact contents and steps vary between products, read the specific kit's instructions before starting.
Notice the pattern. They all work by gently abrading the surface. They all range from mild to moderate. Every reputable source pairs them with the same follow-up: seal the lens afterward. That follow-up isn't optional. It's the step most people skip. We'll come back to it.
The "hacks" to avoid, and the truth about the popular ones
Knowing what works is just as important as knowing what quietly wrecks your car. Some of the most-shared tricks online belong here.
Bug spray.warns that while bug spray or mosquito repellent may give some immediate clearing of the lens, it also contains chemicals that can melt or destroy plastic. Don't spray it anywhere on or near your vehicle.echoes the same warning. Harsh chemicals like bug spray on plastic headlight covers can react with plastic or paint and cause more problems than they solve. The temporary "clarity" you see is the chemical starting to attack the plastic. That's not cleaning. That's damage.
Acetone.is blunt: although acetone may technically clean a headlight, it's extremely dangerous to use near any painted bodywork or plastic because it will damage them on contact. Skip it entirely.
Clear coat paint sprayed straight over oxidation. This sounds clever. As a standalone shortcut it tends to fail.notes that spray clear coat is time-consuming, its effectiveness is uncertain, and over time the clear coat will itself oxidise and crack. These products weren't designed to cover headlights. They may actually make your visibility worse. There's a right way to seal a lens, covered later. Blindly rattle-canning clear coat over a bad lens isn't it.
Harsh household cleaners.points out that a number of strong home cleaning solvents can technically clean headlights but also damage paint and coloured plastic after repeated use. They're best avoided.makes a narrower exception for ordinary window cleaner to lift dirt and grime. Check that the product is suitable for automotive use before trusting it on your lenses.
Now for the two hacks people ask about most. They deserve a clear verdict.
Frequently asked questions
Does WD-40 fix foggy headlights?
Sort of, and only for a day.explains that WD-40 can temporarily make cloudy headlights look clearer because it adds a layer of oil that fills the surface. It doesn't remove the oxidation or restore the plastic. Once the oil wears off the headlights return to their cloudy state.itself frames headlight care as a multi-step process. Wipe the lens and apply automotive wax for a clarity boost. Then address worn UV coating, polish away surface oxidation, and for severe cases, sand and buff. Read those two together and the honest takeaway is clear: a wipe-and-oil trick can buy you temporary cosmetic improvement. It's a stopgap, not a repair.
Does a magic eraser or rubbing alcohol work?
Same category, same limits.says a melamine sponge can remove surface oxidation and make headlights appear clearer for a short time. It can also scratch the plastic if used too aggressively and offers no long-term protection. Rubbing alcohol can remove surface dirt and grime but won't fix oxidation or deeper cloudiness from UV damage. Useful for prep, not a cure.
Will dish soap clean my headlights?
Plain dish soap and water is a cleaning step, not a restoration step. It removes road grime, dust, and oily film sitting on top of the lens. It's a real and necessary first move.starts its whole restoration by washing the headlights with soapy water or detail spray to clear the surface so debris doesn't get caught under the sandpaper later. But if the yellow or milky look is oxidation baked into the plastic, no amount of soap will touch it.notes that the damage is in the lens material itself and survives repeated washing. So: wash first, always. But don't expect soap alone to clear a genuinely oxidised lens. If a good wash makes them clear, they were only dirty. If it doesn't, you've moved into restoration territory.
The real fix: wet sanding, polishing, and sealing

When the haze is real oxidation and the mild tricks only get you halfway, the proper repair is to remove the dead plastic layer with progressively finer sandpaper, polish the surface back to clarity, and seal it. It sounds intimidating. It does carry some risk. The logic is simple and the sources agree closely on the method. Set aside a couple of hours.estimates one to two hours depending on how bad the lenses are.similarly puts it at two to three hours with attention to detail.
-
1
Wash and mask
Clean the lens first so grit doesn't drag under your sandpaper. Then protect the paint. Every source treats masking as non-negotiable.uses masking tape to shield the surrounding paint and trim from accidental scratches.calls taping up all the paint around the headlight the single most important step of the whole process. Don't rush this part.
-
2
Wet sand from coarse to fine
This is the heart of it. Keep the lens and sandpaper wet throughout. That's why it's called wet sanding. Work through increasingly fine grits so each pass removes the scratches left by the last. The exact grit ladder varies by how bad the lens is.works with 2000-grit then 3000-grit sheets on a soaked lens, keeping the surface lubricated with water or a clay lubricant. The yellowish sludge in the runoff turns white as the oxidation comes off.starts coarser, at 800 grit, then moves to 1000 and finally 2000, spraying water constantly. You can add a few drops of soap to the water to keep the lens lubricated.describes a 1500-to-2500 range for heavier restoration. The rule they share: on the coarsest grit, sand in one direction only.explains this makes it easy to see that you're sanding evenly and haven't missed a spot.similarly says to move in a single direction on the starting grit and only alternate directions as you progress to finer paper. Don't panic when the lens looks cloudy or frosted after sanding.notes that a cloudy look at the end of sanding is a normal part of the process. The polishing step is what brings back the clarity.
-
3
Polish
Sanding leaves a uniform haze of fine scratches. Polishing removes them and returns the lens to clear.applies rubbing compound with a pad on a drill, spreading it before turning the drill on to avoid splatter. Work up to speed to erase the 2000-grit scratches until the lens shines.uses a machine polisher (or a drill) with a cutting compound and then finer polishes to break down the abrasives and clear the lens. Here's one blunt safety warning worth repeating: keep the polisher moving constantly. Lingering in one spot can burn a hole in the plastic.offers a no-machine version. Rub headlight polish on by hand in a circular motion until the lens is clear and smooth. Repeat on any spots that are still foggy. If you don't own a polisher or drill, hand polishing works. It simply takes longer.
-
4
Seal — do not skip this step
This is the step that decides whether your work lasts a month or a year. Remember that sanding and polishing strips away whatever was left of the factory UV coating. The freshly cleared plastic is now naked and will re-oxidise fast if you leave it that way.is explicit that the process may have removed the protective coating entirely. Skipping the UV sealant means the headlights may yellow more quickly and be more susceptible to damage.applies a UV-protective sealant that provides up to twelve months of UV defence. Let it sit briefly before buffing off the excess.takes a DIY route, brushing on a thinned clear coat. Its first coat lasted about a year and a half before any haze returned. It's honest that the solution isn't completely permanent and may need reapplying over time. Whatever product you use, the principle is fixed: bare restored plastic must be resealed. Or you'll be doing this again in a few weeks.
Not every lens can be saved.says most acrylic headlights can be restored unless they're severely damaged or scratched beyond repair.advises that if treatments don't work, weighing the effort and cost of refinishing against simply installing a new lens is the sensible call. Restoration is the right first move for the vast majority of hazy headlights. It's not magic on a lens that is cracked or gouged through.
Keeping them clear: prevention that actually helps
The sun never stops. A restored headlight is on a clock from the moment you finish. The good news is that a little maintenance dramatically slows the return of the haze. In a high-UV climate that maintenance pays off faster than almost anywhere.
The core preventive move is the sealant already discussed, kept up over time.
Maintenance that slows the haze
- Apply a UV protectant every few months while the headlights are still in good condition, especially if the car is parked outside during the day.
- Wash the car regularly with a cleaner suitable for the lenses to stop dirt and debris from building up.
- Keep the car out of direct sun where possible — use a garage, cover, or shaded spot.
- For a car living under a Gulf sun, treat that "every few months" reapplication as a real item on your maintenance list. The environment that yellowed them the first time hasn't gone anywhere.
When the fog is on the inside: getting moisture out of a sealed headlight

Everything above is for haze on the outside. If your lens is clear and smooth but there's fog, droplets, or standing water behind it, none of the sanding and polishing applies. The problem is sealing, not surface. This is where people get most confused. This is where dangerous "hacks" like drilling holes come from. Here's the calm version.
Why it happens.describes two very different causes. The mild one is simply moist air inside the housing. When the bulb heats up it warms that air. When it cools it can leave condensation on the inside of the lens. This usually dissipates as the headlight warms up and vents. The serious one is a leak. A bad or cracked seal around the lens lets water enter over time. It can stain the housing, grow mildew, and even burn out a bulb quickly if water contacts the hot glass. The easy way to tell them apart, per: if the fog clears when you use the car, it's minor. If it gets progressively worse, if there's water sitting inside, or if it's hurting your night visibility, it's serious enough to deal with promptly.
Fixing minor condensation without breaking the seal. For a little fog, you often don't need to open anything.recommends first checking the housing's vent. Most headlight units have one to prevent condensation buildup. A common cause of minor fogging is that vent being blocked by debris, dust, or spider webs. Carefully wipe the vent or blow it out with a small amount of compressed air. Use minimal pressure so you don't disturb the bulb or blow out the seal. Check that the bulb seals and gaskets are intact and not nicked. In a dusty climate this vent check is worth doing more often than you might elsewhere.
Clearing major condensation. When there's real water inside,lays out a more involved routine that generally means removing the headlight assembly. In brief: take out the assembly and remove the bulbs, handling the glass carefully. Blow warm, dry air into the vent or over the housing with a hairdryer so the moisture turns to vapour and escapes through the bulb openings. Let it cool to see whether it worked. Place a desiccant such as silica gel packs inside to absorb remaining moisture. Be sure to remove the packs before reassembly so they don't sit in front of the beam or touch the bulbs.confirms in its FAQs that both a hairdryer and ordinary household silica gel packs are safe to use this way. The one condition: the desiccant must come out before you drive.
Stopping it from coming back. Drying the inside is pointless if water can walk right back in. The real repair is the seal.advises inspecting the seal for damage or debris and, if needed, running a bead of silicone sealant around the factory seal area. Or replace the seal if the housing uses a replaceable one. Check the O-rings that protect the connectors, bulb, and vent. For longer-term prevention, inspect for moisture after every car wash as an early warning of a bad seal. Check the vents about once a year when you change a bulb. Apply butyl rubber sealant around the seam if you suspect the seal is damaged.
About drilling a hole in the housing. This trick shows up constantly. It deserves an honest, direct answer. The entire point of the drainage-and-drying approach above is that the housing is supposed to be a sealed, vented unit. The proper vent already exists to let vapour escape, asdescribes. Puncturing a new hole in a sealed assembly to let water out also creates a permanent new opening for dust, water, and humid air to get in. That works directly against the sealing repair that actually solves the problem. The reliable path is the one the source lays out: clear the existing vent, dry the interior, and restore the seal. Don't make a new hole you'll then have to worry about.
When to stop and replace. As with outside haze, there's a point of diminishing returns.is candid that if a headlight keeps collecting moisture after you've dried and resealed it, there may be an undetected crack in the housing. Replacing the assembly may be the answer. It adds a practical tip: if one headlight has a moisture problem, keep an eye on the other. The same issue often shows up on both. Knowing when to stop is part of doing the job well.
Putting it all together
The bottom line
The reason "how to clean foggy headlights" feels so contradictory online is that the phrase hides two different problems. Most advice never tells you which one it's solving. Start by diagnosing. Rough, yellow, milky plastic on the outside is oxidation from the sun. Clear plastic with fog inside is trapped moisture. For outside haze, the cheap tricks like toothpaste, baking soda and vinegar, and lemon are real but mild and temporary. Several popular "hacks" like bug spray and acetone actively damage your car. The lasting fix is to wet sand, polish, and above all, seal. Then keep that seal maintained. In Kuwait's sun, that maintenance matters even more. For inside moisture, tell minor condensation from a real leak. Clear the vent or dry the housing with heat and a desiccant. Repair the seal. Don't drill a hole that only invites more water in. None of it is complicated once the two problems are kept apart. Most of it you can do in an afternoon with patience and a little care.
If your headlights have reached the point where restoration is on the agenda, it usually means the rest of the car could use some attention too. Doing it properly in Kuwait's heat and dust is exactly the kind of job that is easier when someone comes to you. Master Wash offers mobile car wash and detailing at your home or workplace. Keep your car clear, clean, and safe to drive at night without spending your day off in the driveway.