How to Clean an Engine Bay Safely: A Practical Guide
You pop the hood to check the oil, and there it is: a dingy, oily layer of grime coating everything, dust packed into every corner, and a general film that makes the whole engine look tired. You want it to look clean again, but the moment you search for how to do it, the advice splits into two camps that seem to hate each other. One side sprays the entire engine down with a pressure washer like it's nothing. The other side warns that a single drop of water in the wrong place will fry your electronics and leave you stranded. Somewhere in the middle you find people swearing by dish soap, others insisting on WD-40, and a few telling you never to touch it at all.
The truth is simpler and more useful than any of that. Cleaning an engine bay is genuinely worth doing. It's safer than the nervous camp believes and more delicate than the pressure-washer crowd admits. Almost all the risk comes down to a handful of decisions you make before you spray anything. This guide walks through those decisions: whether you should bother at all, what's actually safe on a modern car versus an older one, what to clean with and what to avoid, and the exact order that keeps water and chemicals away from the parts that matter. It also adapts every step to the one factor most engine-cleaning guides ignore entirely—heat, dust, and hard water in a climate like Kuwait's. By the end you'll know what to do, what to skip, and why each step matters.
In this guide
- Is it even worth cleaning your engine bay?
- Is it actually safe to clean an engine bay with water?
- Before you spray anything: the preparation that actually protects your car
- What to clean with, and the products to avoid
- The waterless method: when water is not an option
- Finishing: dressing and protecting the plastics
- Cleaning an engine bay in Kuwait's heat, dust, and hard water
- How often should you clean your engine bay?
- When to leave it to someone else
Is it even worth cleaning your engine bay?
Before you spend an afternoon on this, it's fair to ask whether a clean engine does anything beyond looking good in photos. It does, and the most practical benefit has nothing to do with appearance.
A clean engine compartment makes leaks and problems visible while they're still small, rather than leaving them camouflaged by a uniform layer of grime, as Hagerty points out in its guide to safely cleaning an engine bay. When everything under the hood is the same shade of greasy black, a fresh weep of oil or coolant blends right in. When the surfaces are clean, a new leak shows up immediately as an obvious wet patch, and you get the chance to deal with it before it becomes an expensive surprise. Simple Green makes the same case, noting that a schedule of basic engine cleaning once or twice a year helps you spot leaks and contributes to a better overall life for the vehicle.
There's a maintenance angle too.notes that a clean engine runs with more efficient cooling and less wear on cables and pulleys. The reasoning is straightforward: caked-on grime acts as an insulating blanket that traps heat, and grit sitting on moving cables and belts doesn't help them any. A DIY guide on Instructables adds another honest reason that owners rarely mention out loud: a buildup of debris such as leaves or mud can cause areas to rust out over time, making the clean a form of preventative maintenance rather than pure vanity. The same guide notes the practical perks: a clean bay is simpler to work on when you're doing maintenance, it's easier to spot a leak, and it helps at resale time.
So yes, it's worth doing. Not because a spotless engine adds horsepower, but because a clean bay is easier to inspect, easier to work on, and less likely to quietly hide the early signs of a fault.
Is it actually safe to clean an engine bay with water?
This is the question that stops most people before they start, and it deserves a straight answer rather than a hedge. On a modern car, yes, cleaning the engine bay with water is safe, provided you use sensible pressure and keep water from being blasted directly into a few specific components. On an older or heavily modified car, you should be far more cautious and often skip water altogether.
Modern cars are forgiving because of how they're built. Auto Finesse, a detailing brand with a dedicated engine-bay course, explains that on the vast majority of modern vehicles the vital components are covered with black plastic trims, with very few left exposed, and manufacturers now protect engines well using those trim panels together with waterproof electrical plugs. Because of that design, Auto Finesse considers a wet cleaning method, including careful use of a pressure washer, both safe and the most effective way to clean a modern bay. A practitioner write-up republished by Team-BHP puts it more directly: if your car was built after 2005, you shouldn't be afraid to put water into the engine bay, because modern cars are well insulated and designed to handle the beating from water while driving through rain. Meineke echoes the same point, noting that your engine is most likely waterproof from the factory and covering components with plastic bags is an extra precaution rather than a strict necessity.
Notice that none of these sources is saying "hose it down however you like." They're saying the modern engine bay is designed to tolerate water. The danger isn't water itself—it's water delivered with too much force into the wrong place. That distinction is the whole game, and it's why the preparation steps below matter more than the cleaning itself.
Older cars change the calculation.warns that on older vehicles you're much more likely to find exposed electrics or components such as open air intakes, ignition coils, and distributors, and because they tend to be very exposed it recommends avoiding a pressure washer and a wet method in favour of a more targeted, hand-cleaning approach. If your engine has visible, unprotected electrical parts, treat the waterless method later in this guide as your default rather than a fallback.
Before you spray anything: the preparation that actually protects your car
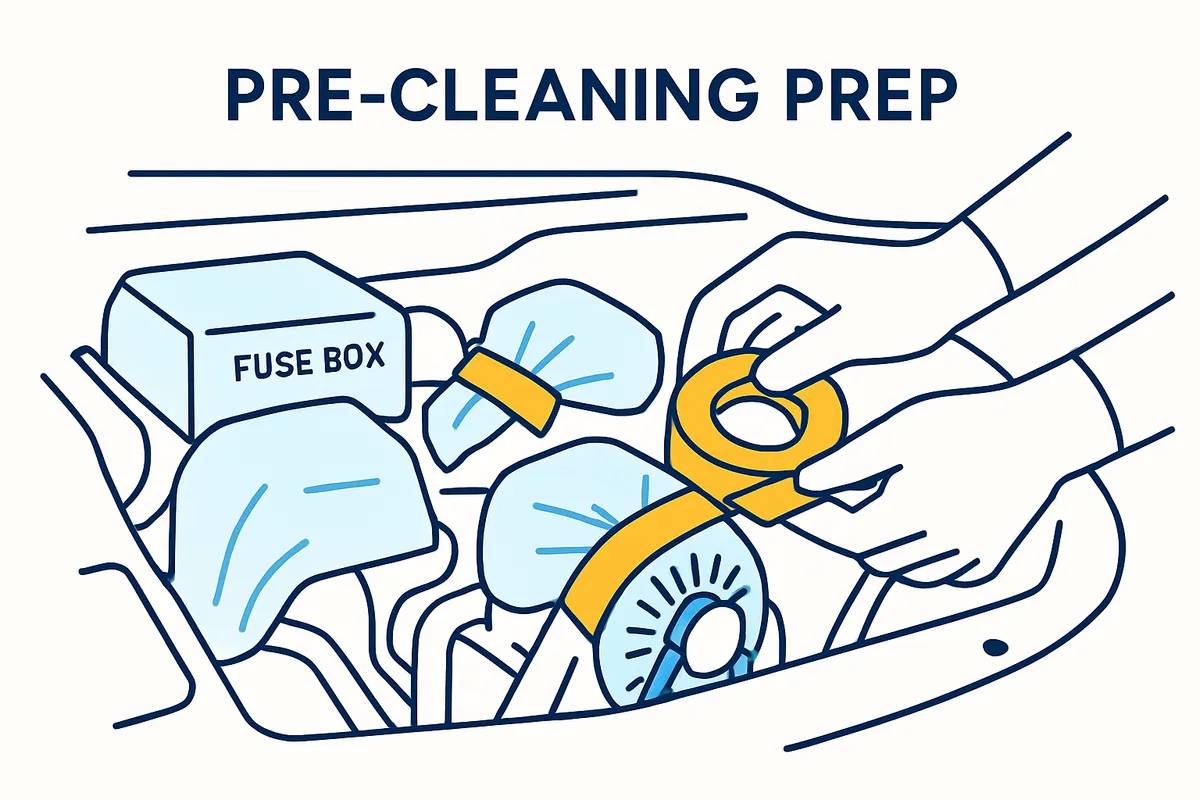
Almost every bad engine-cleaning story traces back to a skipped preparation step. Get these right and the rest is easy.
Preparation steps at a glance
- Let the engine cool down — cold or barely-warm, at least twenty minutes after driving
- Take a "before" photo so you know exactly where every hose and wire sits
- Cover sensitive components — alternator, distributor, air intake, exposed wiring — with plastic bags and tape
- Clear out loose debris by hand or with compressed air before any cleaner or water goes in
Let the engine cool down
Start with a cold, or at most barely-warm, engine.is specific about this: the engine needs to be cool to the touch, and if the vehicle has recently been driven you should let it stand for at least twenty minutes before you even consider starting, using a simple feel test where you can comfortably place the back of your hand on the engine before proceeding. Why the wait? First, you don't want to burn yourself on hot metal. Second, the chemistry matters: degreasers and cleaners need to stay wet to work, and a scorching engine flashes them dry before they can do their job.
Don't try to speed the cooling along by hosing the engine down.warns specifically against spraying a hot engine with water to accelerate cooling, because the sudden temperature change could potentially lead to damage through warping and cracking. Patience here costs you twenty minutes and saves you a cracked component.
Take a "before" photo
This one sounds trivial and turns out to be one of the smartest habits you can build.recommends grabbing a camera and taking a "before" picture before you start, because a single glance at that photo later can remind you exactly where a hose with an awkward bend was attached. If you move a wire or a hose to reach behind it, the photo is your map back to normal. It doubles as a satisfying before-and-after record of the work.
Protect the sensitive components
Even though modern bays are largely sealed, a few parts still deserve to be kept dry, and covering them takes two minutes.recommends covering sensitive electrical components such as the alternator, distributor, and air intake system with plastic bags and tape, and if possible disconnecting the battery terminals and removing the battery before you start.gives a similar list, advising you to cover sensors, exposed wiring, the distributor, and spark plug openings with plastic baggies held on with tape or a few rubber bands, while making the useful point that you're not trying to make the engine waterproof, only to prevent most of the water from soaking those items.
frames the same idea slightly differently for modern cars: it notes that on a modern bay it's rare that anything strictly needs covering, but that a detailer still looks out for areas to avoid, such as intakes, alternators, coil packs, and ECUs, and will mist lightly over those rather than pointing a jet directly at them, covering anything questionable with a plastic bag secured by masking tape or an elastic band if unsure. The theme across all of them is the same: identify the electrical bits, and either cover them or simply keep direct spray off them. Auto Finesse adds one more sensible check before you begin: make sure all the electrical plugs and cables are seated correctly and not loose, so a connector can't quietly pop off while you work.
Clear out the loose debris first
Before any cleaner or water goes in, get the dry junk out.removes loose debris by hand or with compressed air before rinsing, singling out scuttle panels—the area under the base of the windshield—as a common collection point for dirt, leaves, and debris that you don't want to push deeper into crevices.uses the same approach for its no-water method, starting by removing loose debris with an air compressor or vacuum to stop dirt spreading and to cut down on the grime you have to remove by hand later. In a dusty climate this step alone does most of the work, which we'll come back to.
What to clean with, and the products to avoid
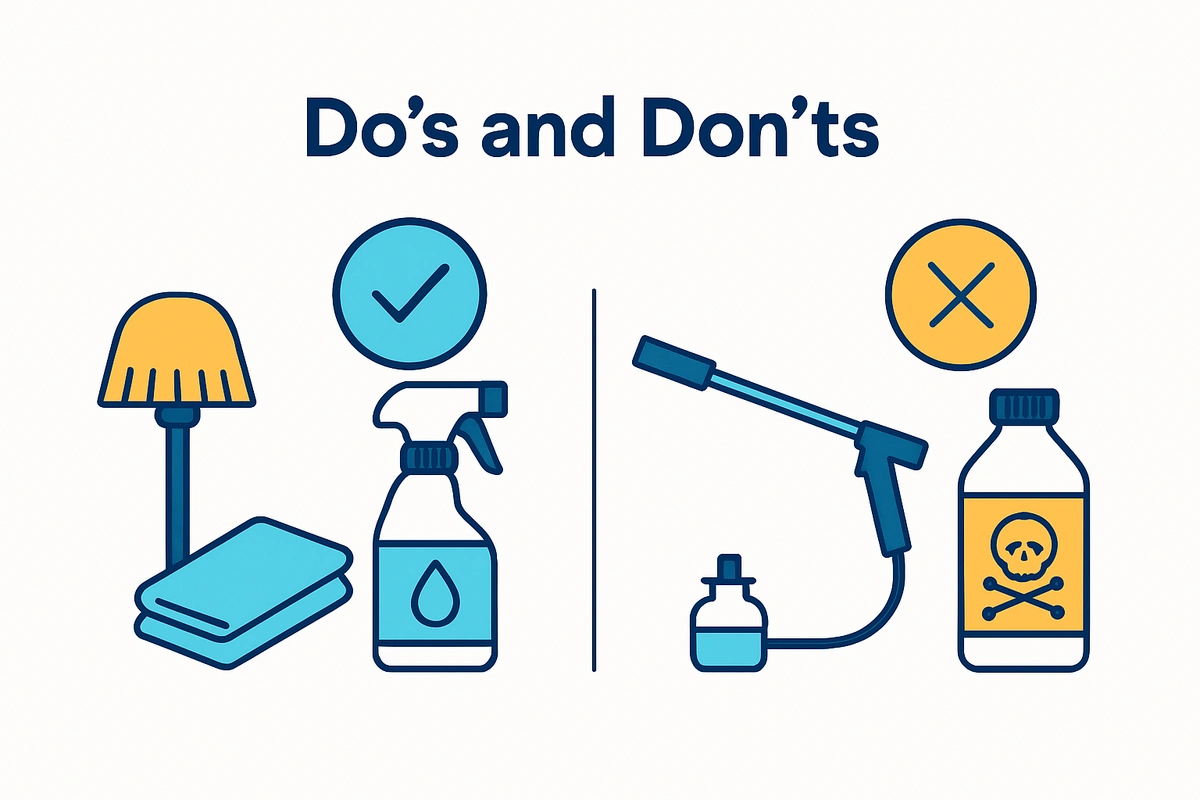
The cleaner you choose matters as much as the technique, and this is where a lot of well-meaning home remedies quietly cause harm.
The job of an engine cleaner is degreasing.explains why an ordinary all-purpose cleaner struggles here: the most common contamination in an engine bay is oily deposits, grease, and fuel or smoke staining, and oily deposits are large, fatty molecules that are harder to remove than ordinary dirt, so a heavy-duty degreaser is needed to break them down into smaller molecules that a cleaning solution can then lift away. In plain terms, you need something built to dissolve grease, not just push dust around.
advises buying a water-based or citrus-based cleaner and specifically warns that petroleum-based products work fast but are harsh and degrade rubber hoses and seals.makes the same distinction from the other direction, noting that many degreasing agents contain petroleum distillates that can erode and deteriorate areas such as rubber seals and hoses, whereas a water-and-surfactant-based cleaner is safe to use on all the surfaces you find under a bonnet, including plastics, bare metal, painted metal, and rubber. The takeaway is simple: reach for a water-based or citrus-based engine degreaser, and steer clear of harsh solvent-based products that attack the rubber your engine depends on.
Two questions come up constantly in searches, and they deserve direct answers.
Frequently asked questions
Can I use dish soap, like Dawn, to clean my engine bay?
It works, with a caveat.uses a bucket of hot tap water with dish soap added to cut back the oily residue in an engine bay, while being upfront that it wouldn't normally recommend dish soap on a vehicle because it strips the wax and protective oils from surfaces. That's exactly why it's acceptable here and not on your paint: in the engine bay, cutting through grease is the whole point, and there's no wax layer you're trying to preserve. So dish soap is a reasonable budget option for the engine bay specifically, but it's not as effective on baked-on grease as a proper degreaser, and you should keep it well away from your car's painted panels.
Is WD-40 good for cleaning an engine bay, and can it clean an engine?
This is the most common myth in the whole topic, and it's worth being clear-eyed about. WD-40 is a water-displacing lubricant, not a degreaser, so while it can leave metal looking momentarily shiny, it's the wrong tool for actually removing grime. Spraying a light oil around a bay to "clean" it tends to leave a slick film that attracts and holds dust rather than lifting the old grease away, which in a dusty environment is the opposite of what you want. The mechanism that actually removes engine grime is degreasing, breaking those fatty oil molecules down so they can be rinsed or wiped off, and a lubricant doesn't do that. Use a proper water-based degreaser for cleaning, and save the light lubricants for the jobs they're actually meant for.
What about vinegar or bleach?
Avoid both.warns against using vinegar because its acetic acid makes metal susceptible to rust, and against ever using bleach because the sodium hypochlorite in it will corrode metals such as steel and aluminium and degrade rubberised seals. These are exactly the kinds of "natural" or "strong" shortcuts that feel clever and quietly cause corrosion. Skip them.
The wet method, step by step
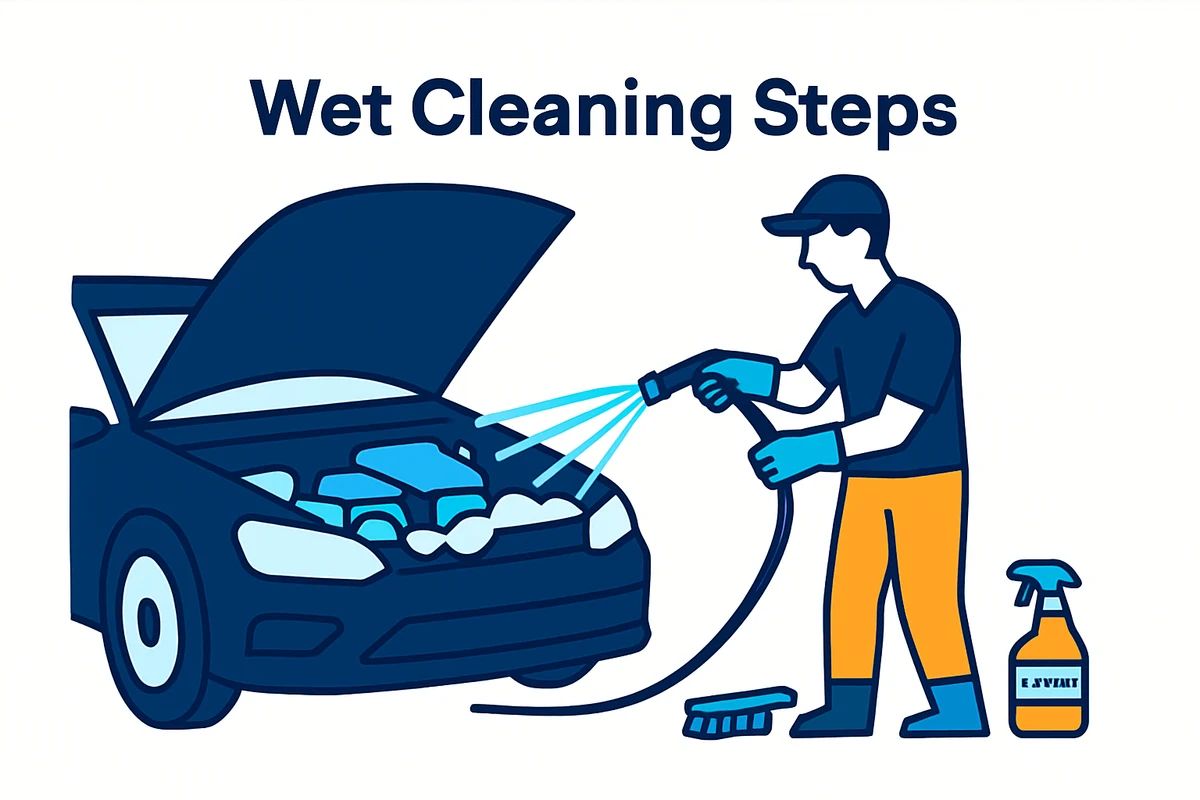
Assuming a modern car and a water-based degreaser, here's the sequence that keeps the whole job clean and controlled. The single most important idea—and the one most people get wrong—is the order in which you work.
-
1
Start at the top: the underside of the hood
insists the engine bay clean should always start with the underside of the bonnet, for a reason that becomes obvious once you hear it: if you rinse the underside first, the dirty water falls down onto the engine bay you haven't cleaned yet, whereas cleaning the bay first means debris from the hood rains back down onto your freshly cleaned surfaces. Work top-down so gravity is on your side. There's one caution up here: Auto Finesse advises being careful of any soundproofing or carpeted padding on the underside of the hood, avoiding soaking those areas because they retain water and can add enough weight to risk the bonnet dropping while you work. Keep heavy spray off the padded liner.
-
2
Pre-rinse to knock off the loose dirt
Once loose debris is cleared, a light rinse over the area removes surface dirt so your cleaner isn't wasted fighting dust it could have washed away for free.begins with a pre-rinse at arm's length, working top to bottom, to remove loose contamination that water pressure alone can handle, so the cleaning agents can then concentrate on the bonded grime where they're actually needed. Crucially, this is a gentle mist, not a blast, and it stays off the electrical components you identified earlier.
-
3
Apply the degreaser and let it dwell
Spray your water-based degreaser over the area and give it time to work. The dwell time is short.has you coat the engine bay thoroughly and allow the cleaner to penetrate for three to five minutes.offers a similar rule of thumb scaled to how dirty things are: around three minutes for a fairly clean engine and about five minutes for a very dirty one. The one thing you must not do is let the product dry on the surface.is emphatic that the degreaser needs to stay wet to lift and encapsulate grime, and that letting it dry out defeats the purpose. Meineke adds a practical tip about direction: apply the degreaser from the bottom up so that it doesn't drip down onto you while you work, and be aware that overspray onto your painted fenders can strip wax, so cover them or rinse them promptly.
-
4
Agitate with the right brush
Agitation is what gets the cleaner into the grime and refreshes it as you go. Use a non-metallic bristled brush so you're not scratching or scoring anything.works the product in with a soft detailing brush and makes an important point about what agitation is for: you're not physically scrubbing the dirt off so much as making sure the solution reaches into every area and stays fresh, pushing dirty residue away and bringing new cleaning agent to the grime. For the tight channels down the side of the engine, Auto Finesse reaches for a long, soft wheel-cleaning brush to get access where a normal brush can't. A useful order tip from the same guide: start at the back of the bay and work forward, so you're not constantly leaning across areas you've already cleaned and covering yourself in residue.
-
5
Rinse gently, and keep the pressure sane
Now rinse the degreaser and the grime it's lifted.advises against a high-pressure nozzle for the rinse because it may damage electrical connections even if you covered them, recommending instead a regular garden hose with an adjustable nozzle set to "stream".is stronger still, warning that both a home pressure washer and the wand at a DIY car wash eject water at dangerously high pressure that can push past gaskets and force its way into electrical panels, connections, and grease fittings. If you do use a pressure washer on a modern bay, treat it with respect., which allows a pressure washer as an option, still says to keep a safe distance to avoid forcing water into sensitive areas, suggesting you start three to five feet from the surface and move closer only as needed, using a low-pressure nozzle to apply and rinsing carefully., working professionally with a pressure washer, deliberately mists lightly over the whole bay rather than aiming the jet directly at electrical components. The consensus isn't "never use pressure" but "never use pressure carelessly": a gentle stream from a hose is the safe default, and if a pressure washer is involved it should be kept back, kept moving, and kept off the electrical parts. Auto Finesse's rinsing tip is to work systematically from one side to the other, inspecting as you go so you can catch any area you missed before it dries.
-
6
Dry it properly
Don't walk away and let the bay air-dry.warns that letting the engine air-dry causes spotting and recommends wiping it down with a clean microfibre towel after giving the engine's own heat a few minutes to help it dry.likewise finishes by drying the engine thoroughly with a towel or compressed air. When you remove the plastic bags you used to cover components, Simple Green suggests folding them inward as you take them off so you don't spill collected water onto the electrical parts you were protecting.adds a clever finishing trick: after drying what you can by hand, take the car for a short drive so the vibration shakes loose any water still trapped in the nooks of the bay.
The waterless method: when water is not an option
Sometimes the wet method is the wrong call. Maybe your engine is older with exposed electrics, maybe you genuinely can't risk water near a particular component, or maybe your situation simply doesn't allow for hosing and runoff. There's a complete no-water approach, and it's more than a compromise.
GUNK, an engine-degreaser maker, lays out the honest reasons owners choose to go waterless: nervousness that water could damage engine components, being somewhere without easy access to water, living where local rules regulate how much water you can use, and concern that engine runoff could harm the local environment. Any one of those is a good enough reason, and the last two matter more than people expect in a mobile or driveway setting where runoff has nowhere controlled to go.
The method itself is patient hand work.begins, as always, by removing loose debris with a vacuum or compressed air, then cleans the surfaces by hand using a bucket of hot water with dish soap, a soft cloth, and a toothbrush or small paint brush to reach into tight areas. It's candid that this takes patience: you rinse the cloth and brush frequently, you'll likely need to change the bucket water more than once, and the whole process simply takes longer than hosing everything down. Dedicated degreasing wipes are another waterless route, which answers the common question of whether you can clean an engine with wipes;, for instance, makes wipes formulated for exactly this kind of automotive job.
One tidy detail: because a waterless clean still throws off some splatter from brushing and misting,recommends giving the car's exterior a quick wash afterward so none of that residue is left to sit on the paint. And do the whole job on a cold engine, both so you don't burn yourself and so the cleaner doesn't flash-dry before it can work.
Finishing: dressing and protecting the plastics
The step that turns a merely clean bay into one that looks genuinely cared for is dressing the plastic and rubber. Modern engine bays are full of black plastic covers and trims, and once they're clean, a water-based trim dressing brings them back to life.uses a water-based dressing with UV inhibitors to restore matte plastics along with rubber seals and hoses, noting that it helps prevent future fading. The more black plastic trim your bay has, the more dramatic this final step looks.
applies a plastic protectant to components such as the engine cover in the same spirit, pointing out that depending on the product it helps repel dirt and helps prevent the plastic from becoming brittle or discolouring, while restoring a subtle satin, close-to-new finish. For tight edges and complicated shapes, working the dressing in with a soft toothbrush reaches what fingers and a cloth can't. A word of restraint on finishing sprays generally:cautions against going overboard with aerosol engine products, since an unrinsed residue of foaming cleaner can cause corrosion, and it prefers spraying a product onto a rag and wiping rather than fogging the whole bay. Restraint and even coverage beat drowning everything in product.
Cleaning an engine bay in Kuwait's heat, dust, and hard water
Every guide above was written for a temperate climate. A Gulf environment like Kuwait's changes the priorities in a few concrete ways, and thinking them through is the difference between a clean that lasts and one that looks tired again within weeks. Treat the following as practical adaptation rather than a different method.
Dust is your primary enemy, so lead with the dry clean-out. Fine desert dust and sand are constantly drawn into the engine bay through the grille and settle in the scuttle panel and the channels around the base of the windshield, which is precisely the debris-collection zone the sources flag. In Kuwait that trap fills with packed dust rather than autumn leaves, but the risk is the same onedescribes, where accumulated debris holds against metal and encourages areas to rust out over time, making the clean a form of preventative maintenance rather than pure vanity. The sensible response is to make the compressed-air or vacuum clear-out a frequent habit in its own right, not just a first step before a full wash. Blowing the dust out every so often does more good than an occasional deep clean.
Heat compresses your working window, so clean in the shade and in sections. The instruction to work on a cool engine and never let the degreaser dry out is easy in mild weather and genuinely difficult under a strong summer sun, where cleaner can flash off in a fraction of the time. The practical advice is to work in shade or during the cooler part of the day, cover a smaller area at a time, and rinse or wipe before the product has any chance to dry. The warning against spraying a hot engine to cool it, because of the risk of warping and cracking, also carries more weight here, since an engine that's been sitting in Kuwait heat is hot for longer; give it the full cool-down rather than rushing it with water.
Sun and UV punish the plastics, which makes the dressing step worth the effort. Those black plastic engine covers bake under intense sun, and the dressing thatrecommends is specifically formulated with UV inhibitors to restore plastics and rubber and to help prevent future fading. In a high-UV climate that protective, anti-fade quality isn't a cosmetic nicety but the thing standing between your trim looking fresh and looking chalky and grey. Reapplying a UV-inhibiting dressing periodically is reasonable advice for keeping under-hood plastics from drying out prematurely.
Hard water means drying promptly matters more. The caution that letting an engine air-dry leads to spotting is amplified by mineral-heavy tap water, which tends to leave more visible deposits as it dries. If you rinse with water, dry by hand straight away rather than leaving beads to evaporate, and lean on's short-drive trick to shake trapped water out of the crevices. Given the combination of hard water and the environmental runoff concerns that push many people toward a no-water clean, the waterless method is often a particularly sensible fit for a driveway clean in Kuwait.
How often should you clean your engine bay?
You don't need to do this often.frames engine cleaning as basic maintenance done once or twice a year, tied to the benefit of spotting leaks. Thepractitioner suggests a similar cadence, recommending a proper engine-bay clean at least once every five or six months. Twice a year is a reasonable target for a full clean.
The dusty-climate adjustment is not to deep-clean more often but to clear the dry dust more often. A full degrease-and-dress a couple of times a year, combined with a quick vacuum or air blow-out of the scuttle area and covers in between, keeps the bay in good shape without overworking it. Chasing a showroom engine every weekend adds risk and chemical exposure for very little gain.
The bottom line
Twice a year is a reasonable target for a full engine-bay clean. A full degrease-and-dress a couple of times a year, combined with a quick vacuum or air blow-out of the scuttle area and covers in between, keeps the bay in good shape without overworking it. In Kuwait's climate, the dusty-climate adjustment is not to deep-clean more often but to clear the dry dust more often. Chasing a showroom engine every weekend adds risk and chemical exposure for very little gain.
When to leave it to someone else
There's no shame in deciding this isn't your job to do. If your car is older with exposed electrics, if you're not confident about which components to keep dry, or if you simply don't want to spend an afternoon crouched over the engine with a toothbrush, the waterless, targeted approach that professionals use on delicate bays is exactly the kind of careful, patient work that's easy to get wrong in a hurry and easy to get right with experience. The margin between a safe clean and a costly mistake is entirely in the preparation and the restraint, which is precisely what a practiced hand brings.
If you'd rather have your engine bay cleaned properly without the risk of guessing which parts to cover or how much pressure is too much, Master Wash offers mobile car wash and detailing that comes to your location in Kuwait, so the whole job, from the careful dust clear-out to a protected, dressed finish, is handled where your car already sits. It's the simplest way to get the benefits of a clean engine bay—easier inspections, better-protected plastics, and a tidier car—without taking on the parts of the job that make people nervous in the first place.